Install And Dual Boot Chrome OS And Windows 11
Install and Dual Boot Chrome OS and Windows 11

Before we begin, I would like to mention that this tutorial involves complex operations and a lengthy procedure. Go ahead only if you are good with operating multiple systems. Apart from that, this guide won’t touch any of your Windows files, but I highly recommend that you back up all your crucial files because you never know when things go wrong.
Pre-requisites
- A USB flash drive with a minimum of 16GB of storage space is a must.
- UEFI Firmware support is another requirement for Brunch to work. It also works with legacy BIOS, but there are a few limitations. You can read them on the Brunch development page.
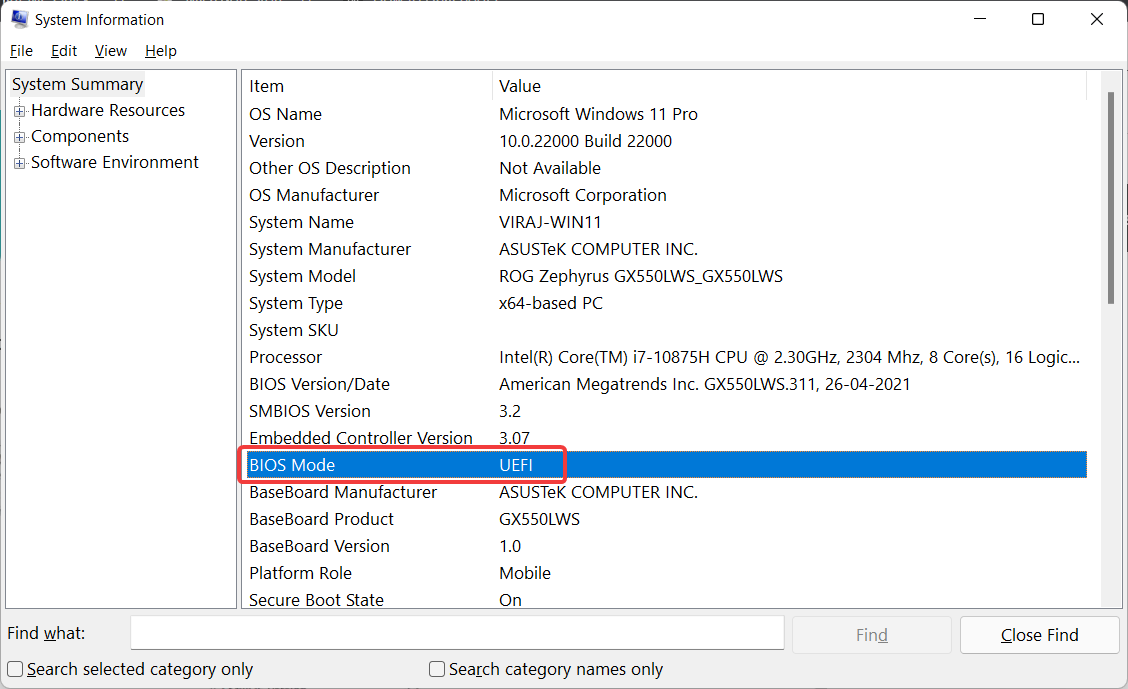
- To check whether your PC supports UEFI or MBR/BIOS, search System Information in the start menu and open it.
- Look for the BIOS mode. You’ll find your PC firmware type mentioned against it.
- Intel hardware (CPU and GPU) starting from 1st generation Nehalem architecture. Note that Intel first-generation graphics do not work with ChromeOS versions above r81.
- AMD Ryzen CPU and GPU. Currently supports AMD Ryzen and AMD Stoney Ridge processors only.
Downloads
We need the following components for flashing Chrome OS on your Windows PC hard drive.
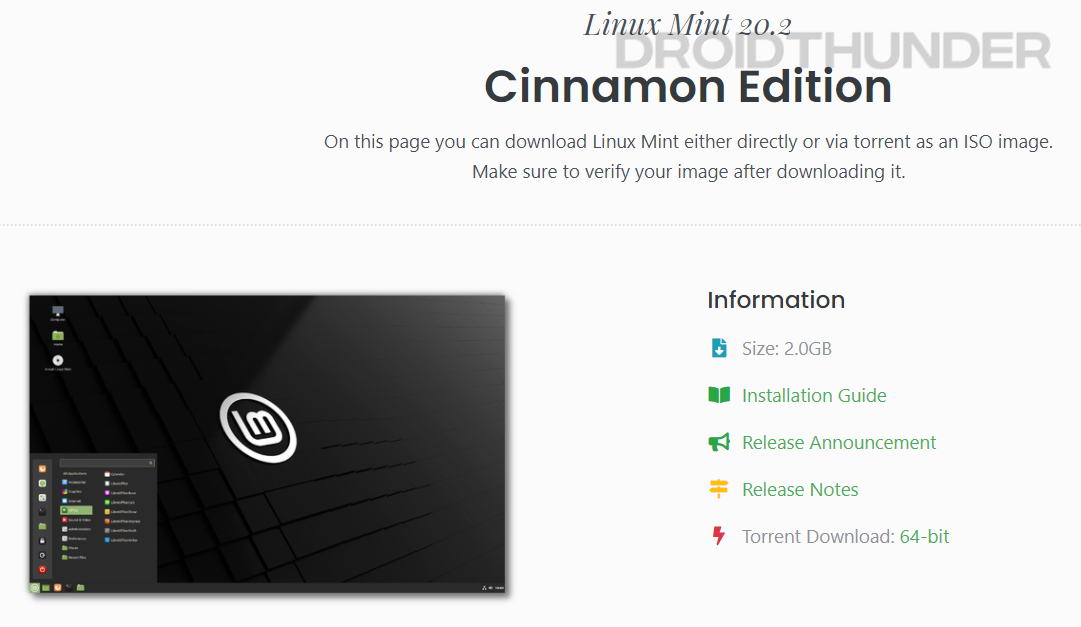
1. Linux Mint
We’ll use the Linux Mint Cinnamon image for dual-booting Chrome OS and Windows 10 or Windows 11 PC. You can use other Linux distros like Ubuntu or Debian too. However, I won’t recommend using them since many users reported that they are facing various errors while installing and booting Chrome OS.
2. Rufus
Rufus is a Windows utility that helps create bootable USB flash drives. Here, the purpose of using Rufus is to flash the Linux Mint image on the USB storage.
Download Rufusfor Windows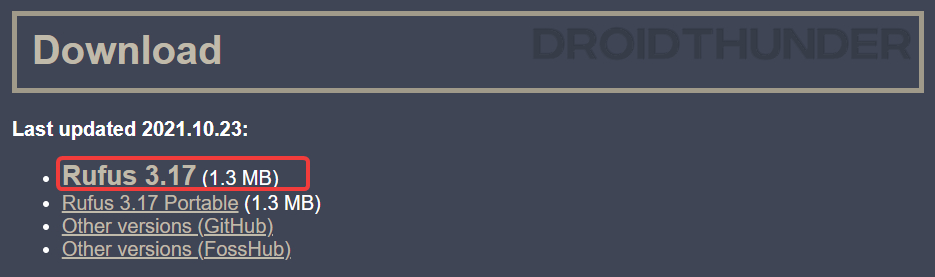
3. Brunch Framework
The purpose of the brunch framework is to build a generic Chrome OS image from an official recovery image. It uses a 1GB ROOTC partition (containing an initramfs, a custom kernel, the swtpm binaries, userspace patches, and config files) and a specific EFI partition to boot from it.
Warning: As Brunch is not the intended way for Chrome OS to work, thus, at some point, some Chrome OS scripts could behave terribly with Brunch and delete data unexpectedly, including Windows / non-Chrome OS partitions. I would highly recommend that you use Chrome OS on a device having less sensitive data.
Download Brunch Framework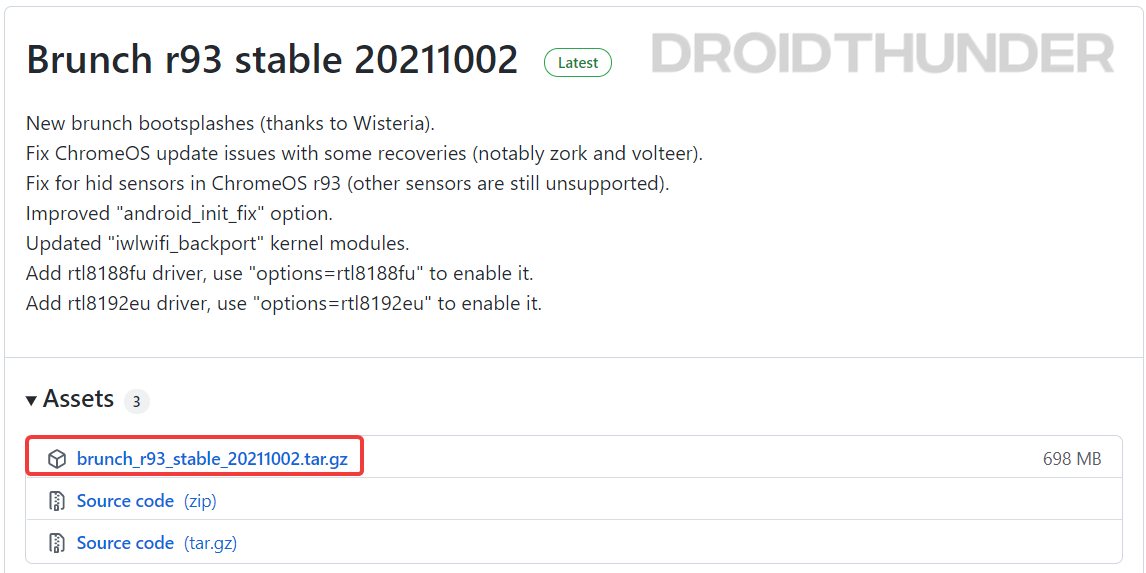
4. Chrome OS Recovery Image
Now, it’s time to get the official Chrome OS recovery image. Click on the download button below. When the webpage opens, look for the word rammus. In the recovery column, hit on the latest recovery image to start the download. While writing this guide, the current version is 94, but it may change subsequently.
The reason we chose rammus is that it works on most modern generations of Intel processors. However, I suggest you go through the below list and download the specific image based on your processor.
Intel Processors
AMD Processors

5. Shell Script
Finally, download the multi_install.sh shell script, which helps install Chrome OS on a Windows partition. Click on the download button below and press Ctrl + S to save the file.
Download multi_install.shMirror (Github)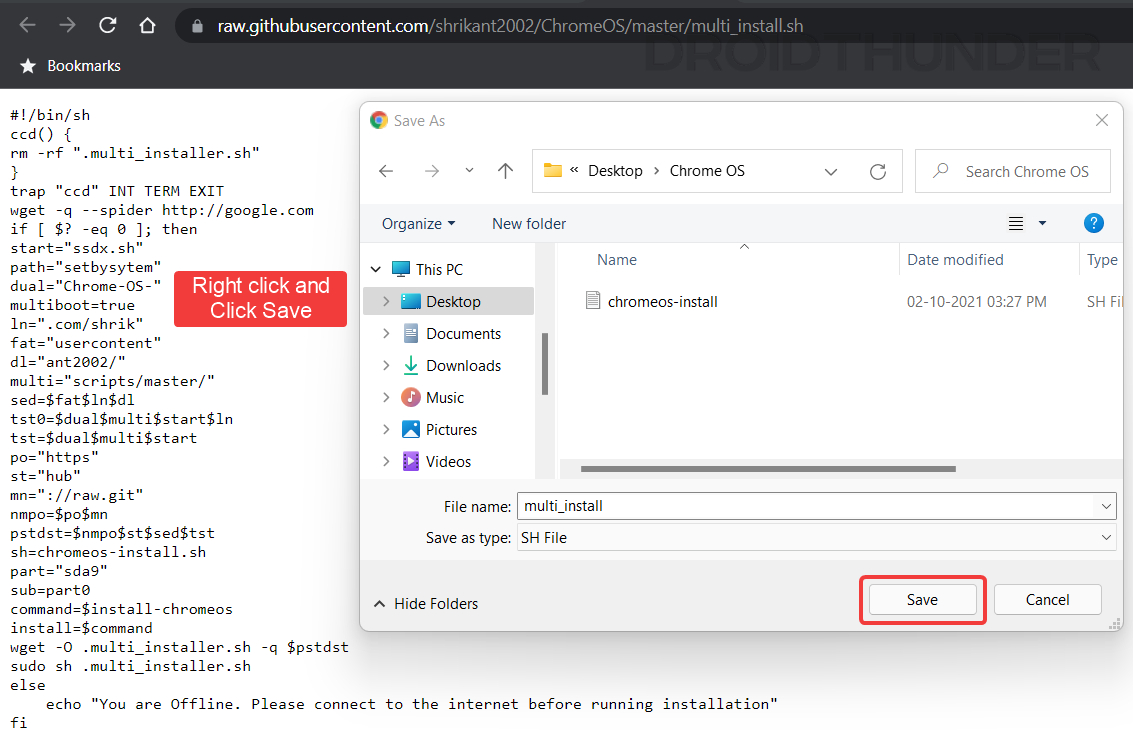
Now that we have acquired all the necessary files – let’s get going to the steps!
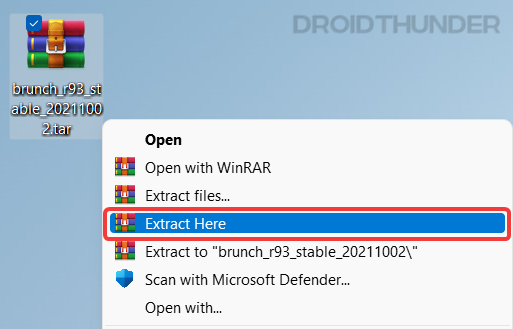
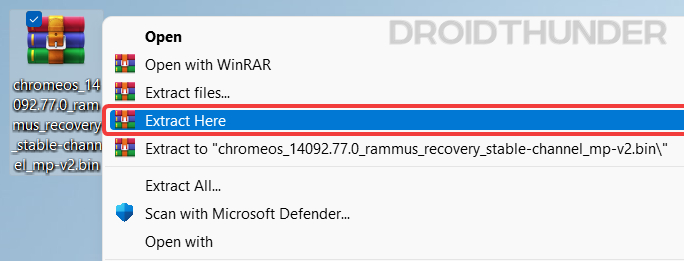
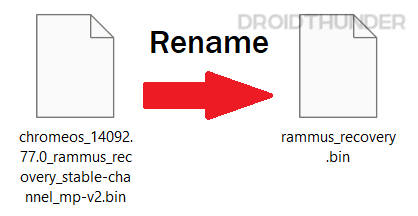
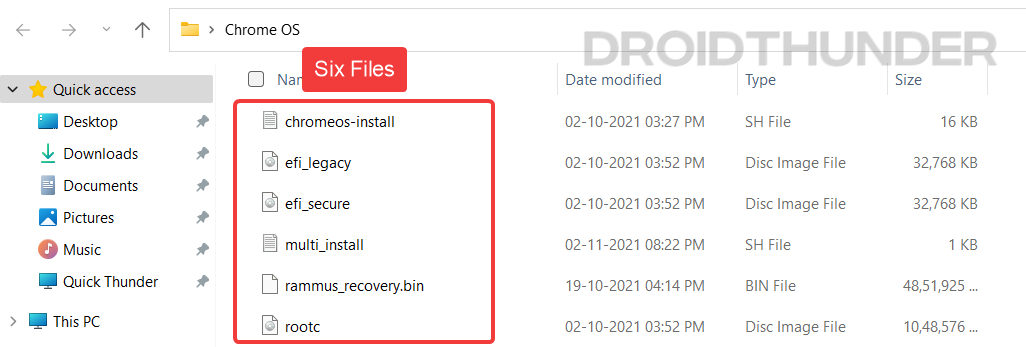
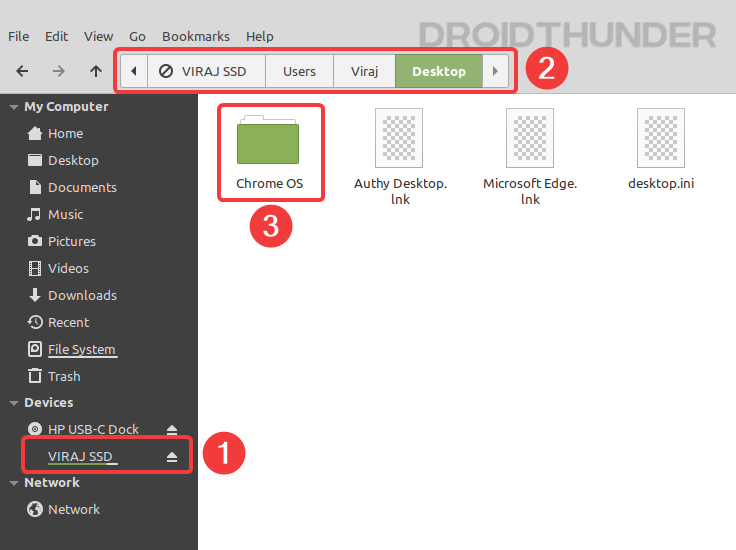
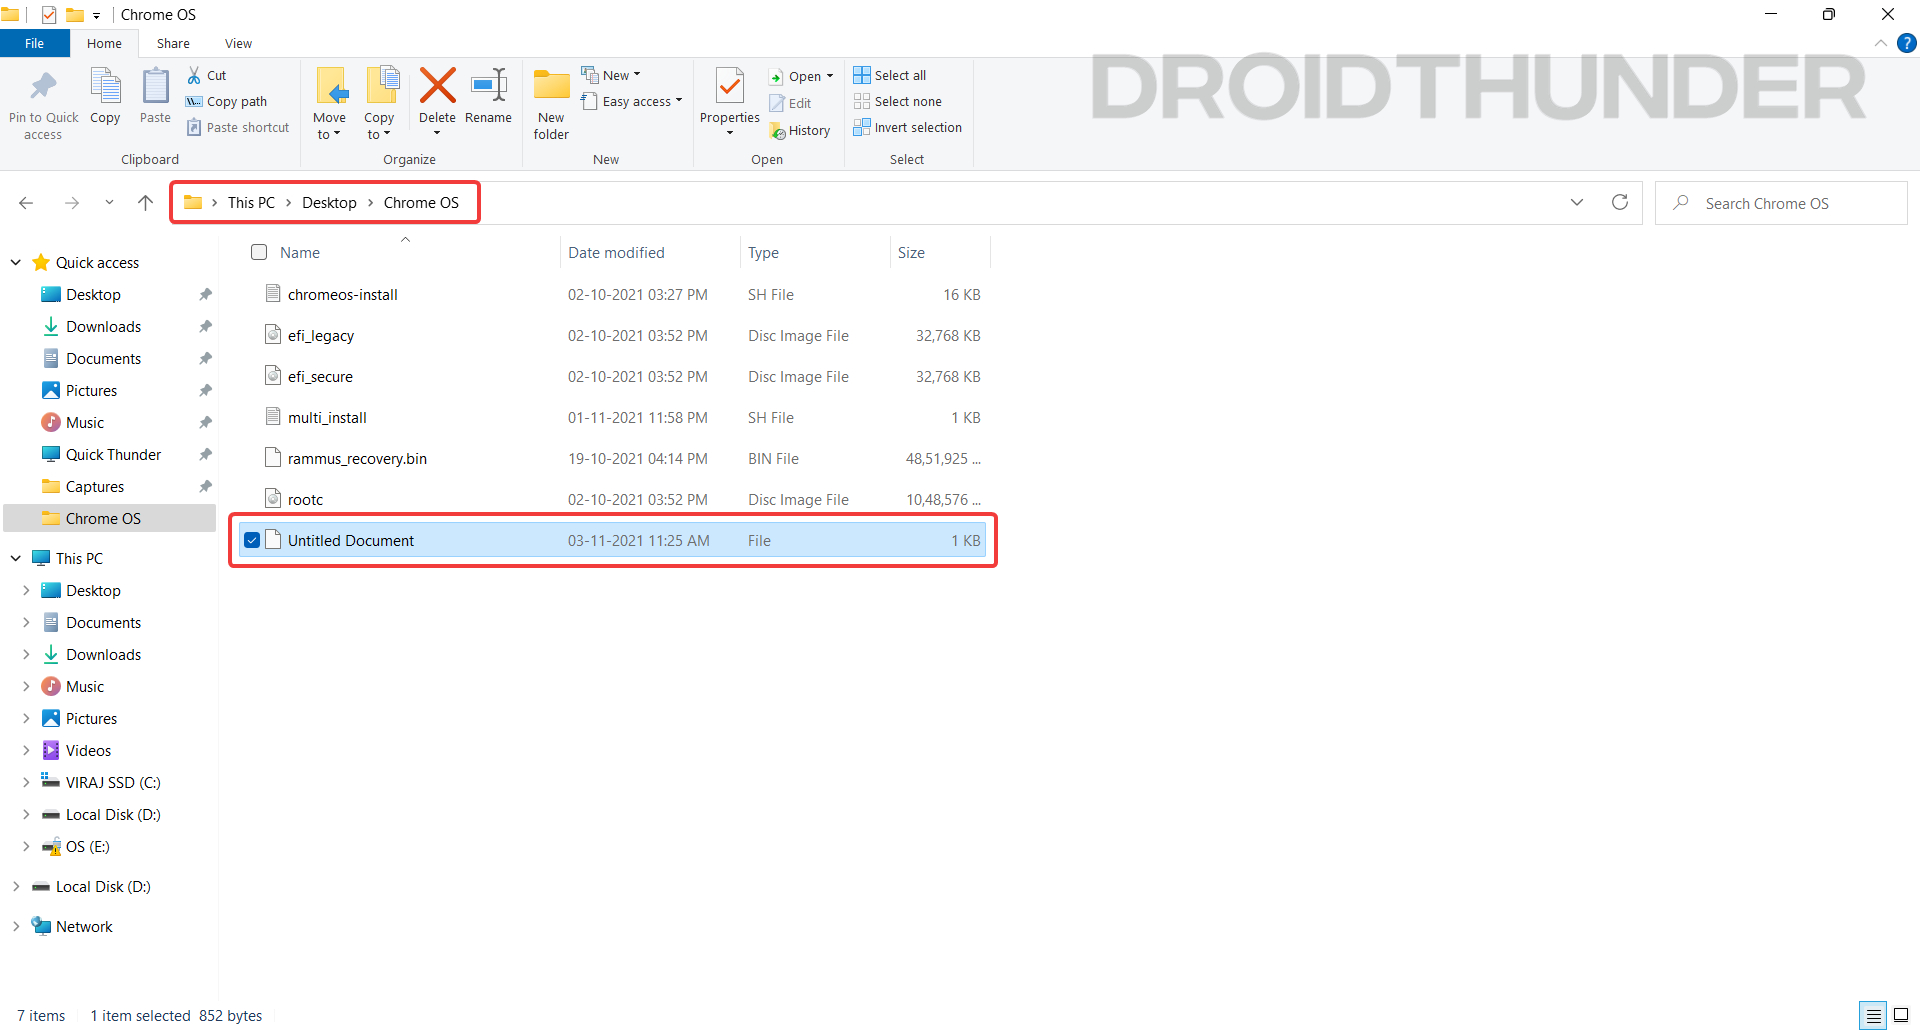
Organize Files in One Place
- chromeos-install.sh
- efi_legacy.img
- efi_secure.img
- rootc.img
Flash Linux Mint Cinnamon
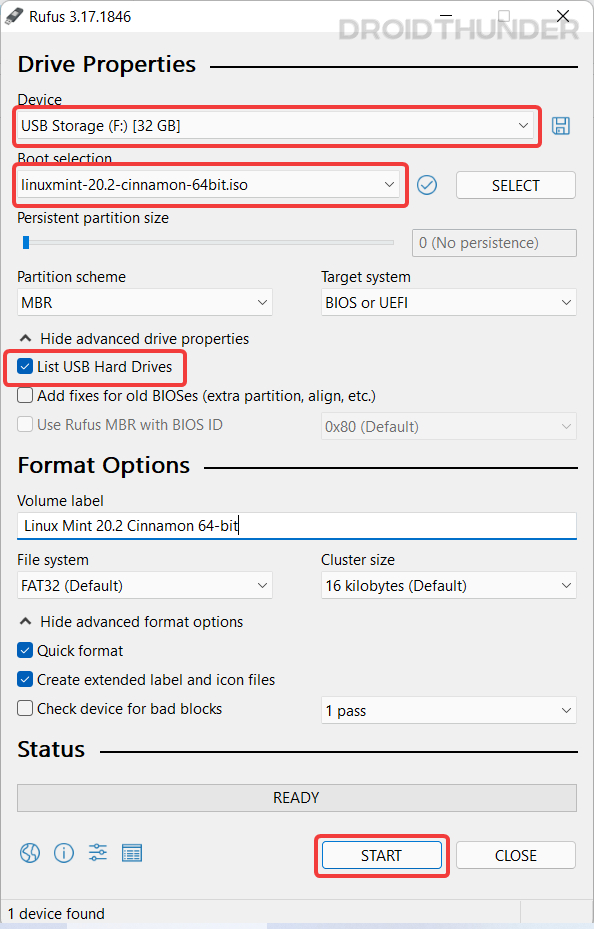
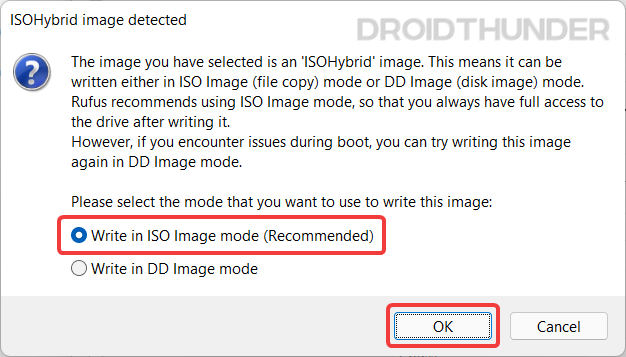
Using the Rufus utility, we’ll flash the Linux Mint ISO image on the USB storage. Linux distro installation is necessary because ChromeOS is a Linux-based operating system, and the shell scripts that we downloaded require a Linux environment to work. The steps for installing Linux Mint on the USB storage are as follows.
- Under Boot selection, select the Linux Mint ISO that we downloaded earlier.
- If you are using a Hard drive, tick the List USB Hard Drives option to see your connected hard disk.
- Keep all other settings unchanged and now press the Start button.
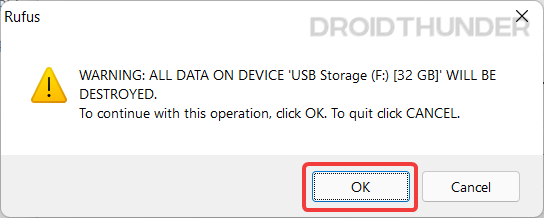
Do note that flashing the USB storage will wipe out all the data present on it. Therefore, we strongly recommend that you back up all the necessary data before pressing the Start button.
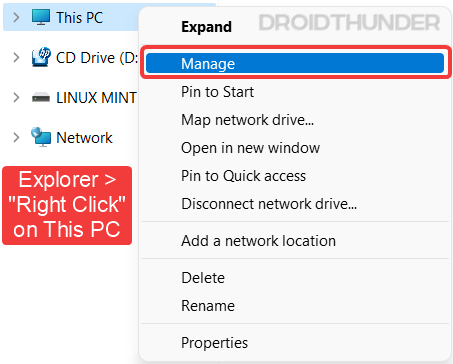
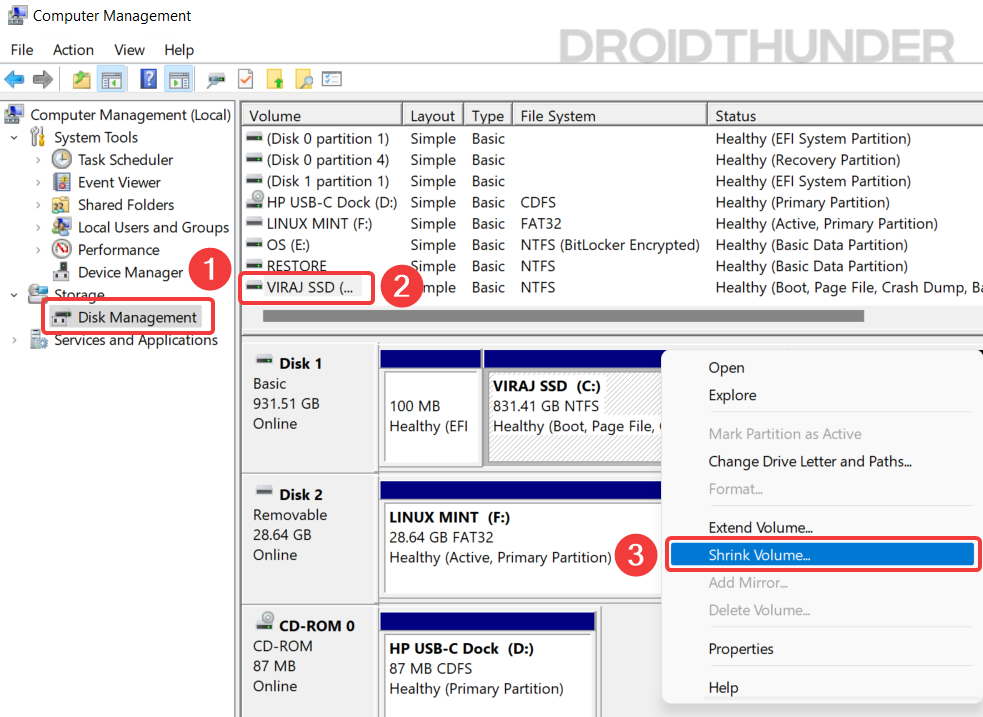
Create Unallocated Space for Chrome OS
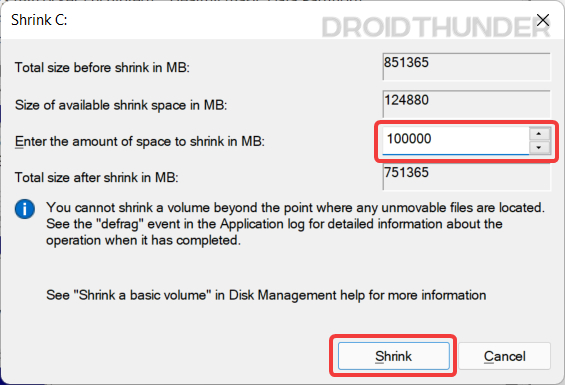
Now, we need to create an Unallocated partition using the Windows Disk Management tool. You need to have at least 14 GB or more free space on the hard drive for creating an unallocated partition. I have given 100 GB of space, but you can choose your partition size.
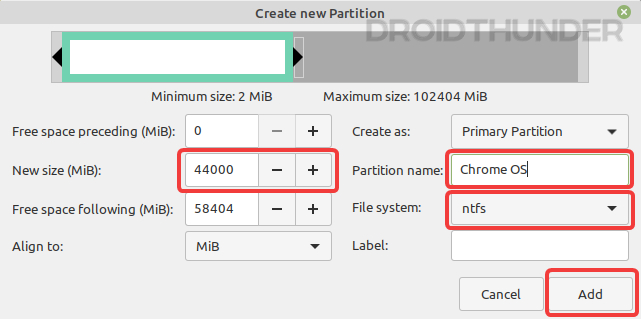
On a side note, let me tell you something. Chrome OS requires partition size in multiples of 22 GB, for example, 22000 MB (22 GB), 44000 MB (44 GB), and so on. But here, you can assign any size you want. Later, before flashing Chrome OS using Linux Mint, we will provide an appropriate partition size.
Let’s shrink the existing drive and create unallocated space. Here are the steps.
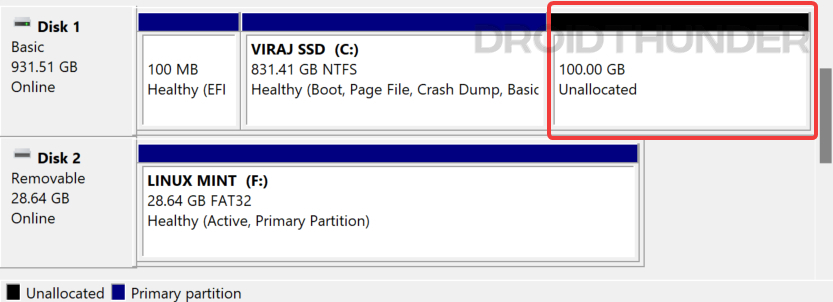
All good so far? Now we have completed all the required operations on Windows OS. Let’s boot the Linux Mint Cinnamon image from the USB flash drive.
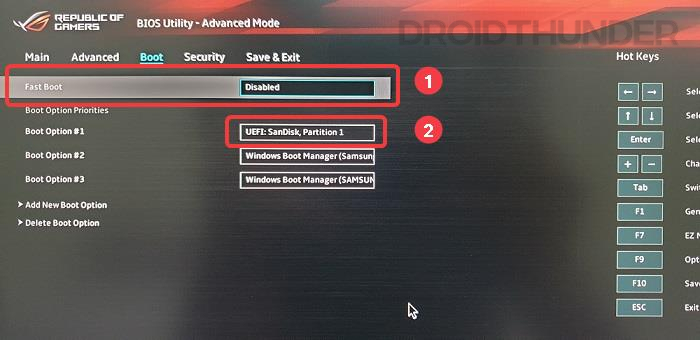
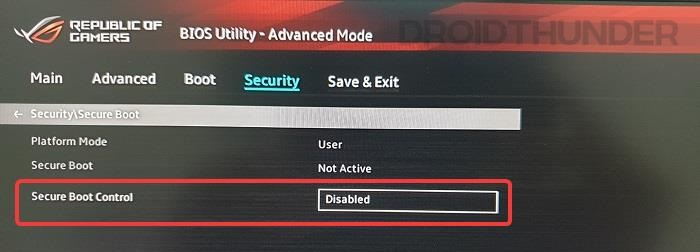
Boot Linux Mint from USB Storage
For Linux Mint bootup and Chrome OS installation, we will have to perform a few operations in the PC BIOS.
| Brands | BIOS Key |
|---|---|
| Acer | F2 or DEL |
| ASUS | F2 for all PCs, F2 or DEL for motherboards |
| Dell | F2 or F12 |
| HP | ESC or F10 |
| Lenovo (Laptops) | F2 or Fn + F2 |
| Lenovo (Desktops) | F1 |
| Lenovo (Thinkpads) | Enter + F1 |
| MSI | DEL for motherboards and PCs |
| Origin PC | F2 |
| Samsung | F2 |
| Sony | F1, F2, or F3 |
| Toshiba | F2 |

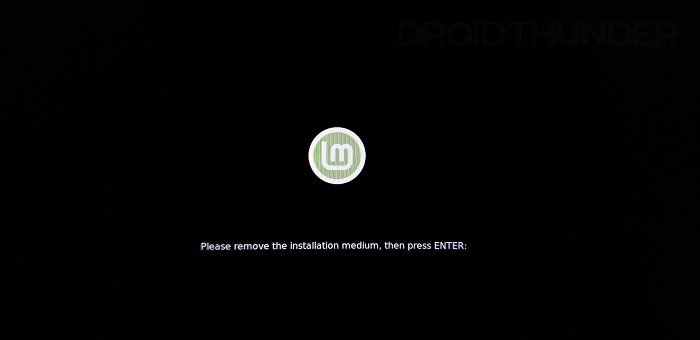
At this point, you should have entered into the Linux Mint Cinnamon OS.
Install Chrome OS
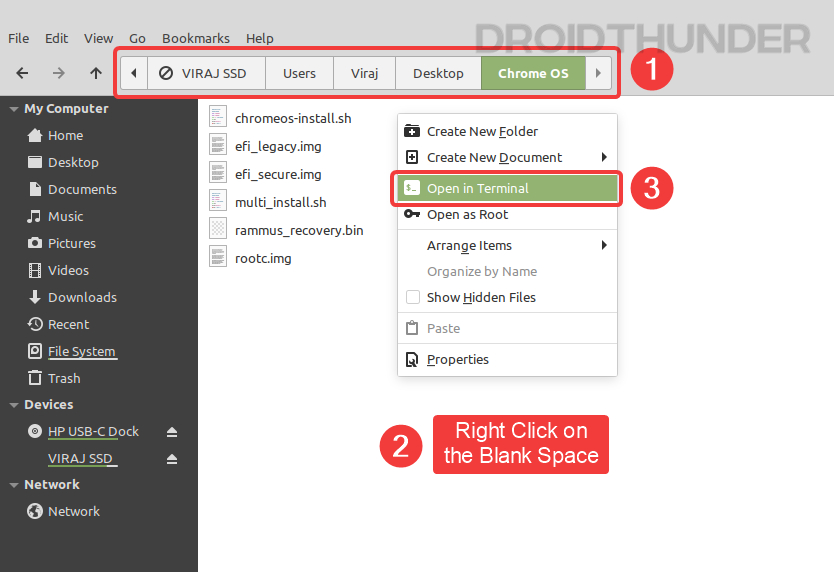
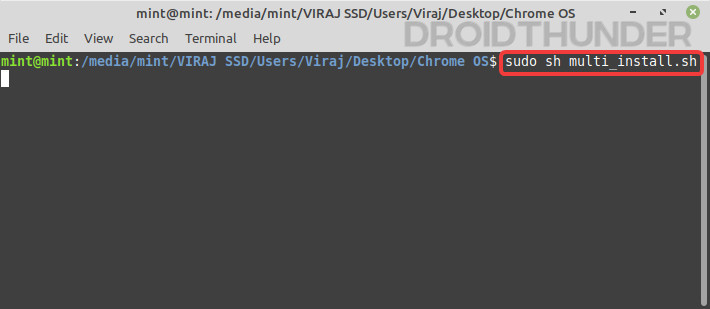
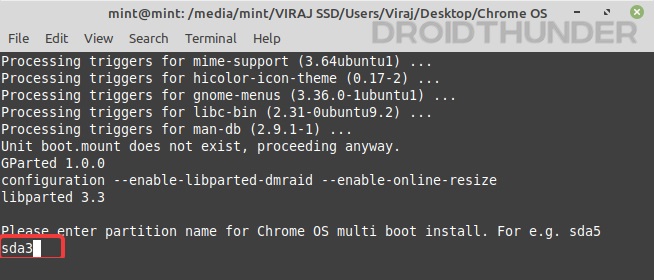
Shell Commands
sudo sh multi_install.sh
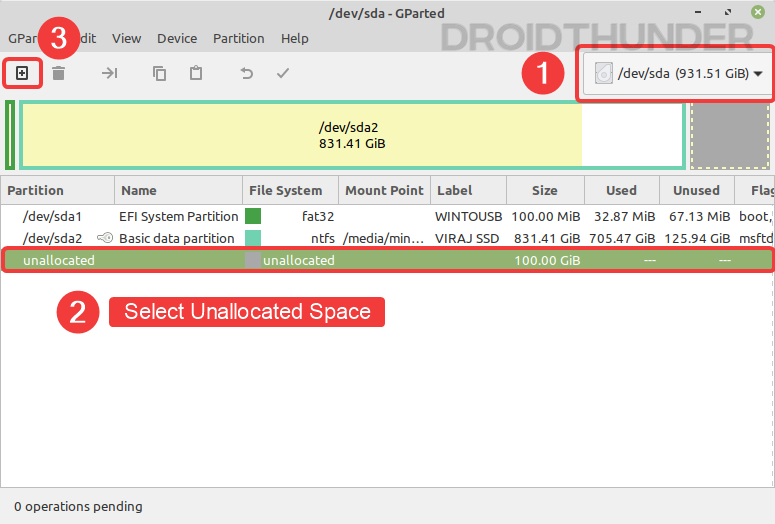
- If you have multiple drives connected to your PC, then make sure that the correct hard disk is visible at the top right side.
- Select the entry named unallocated.
- Click on the plus icon located at the top left to create a partition.
Making NTFS Partition for Chrome OS
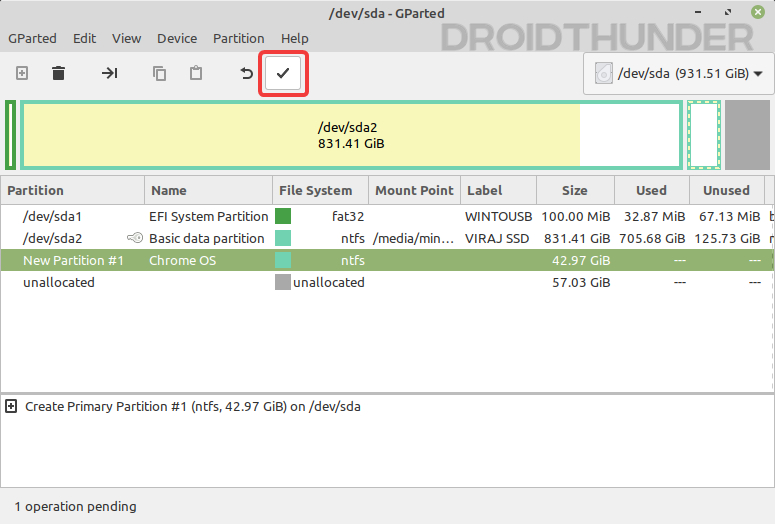
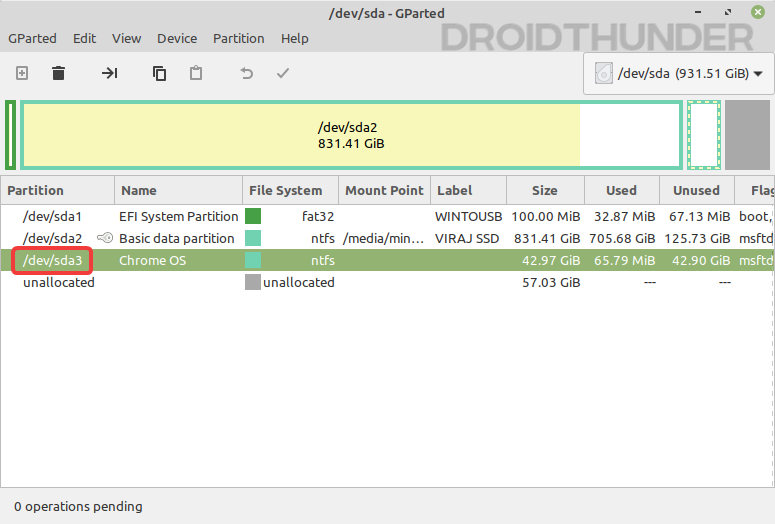
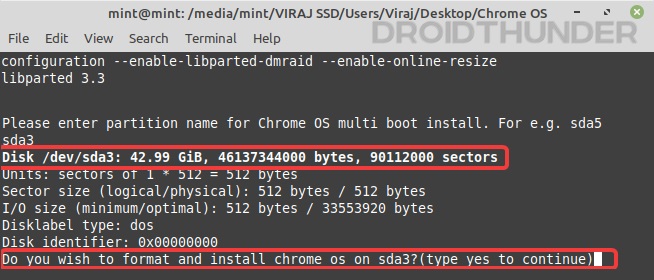
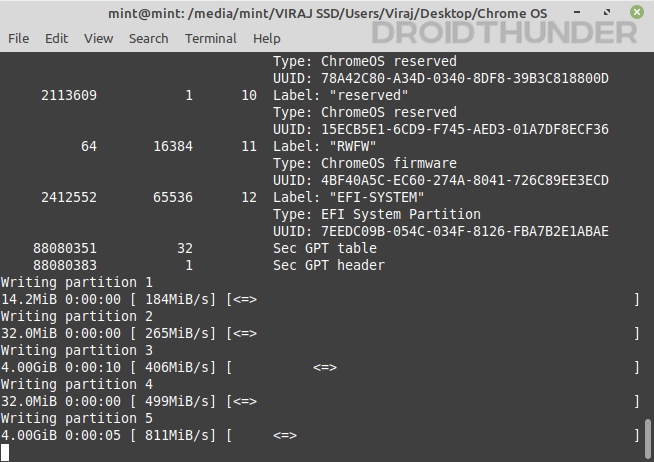
Partition Writing Process and Errors

Dual Boot Windows with Chrome OS
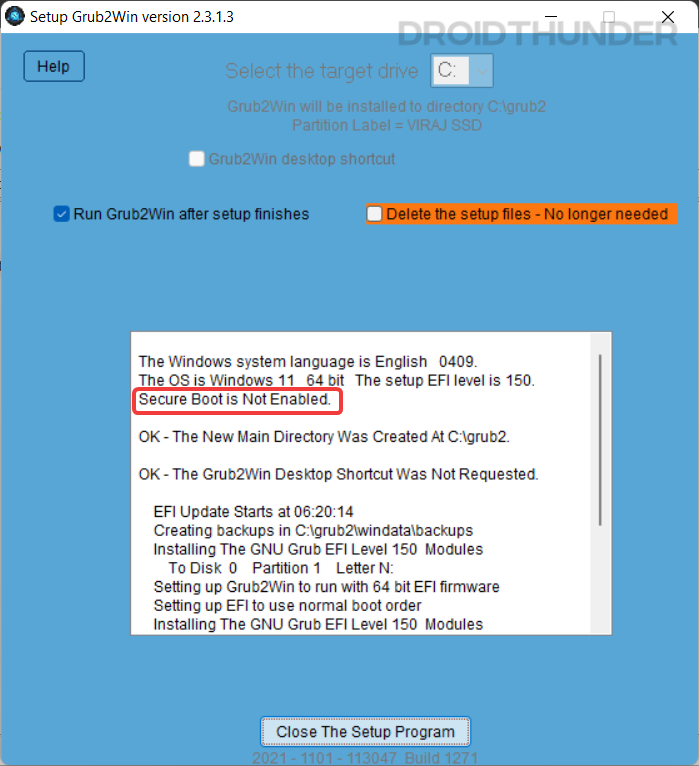
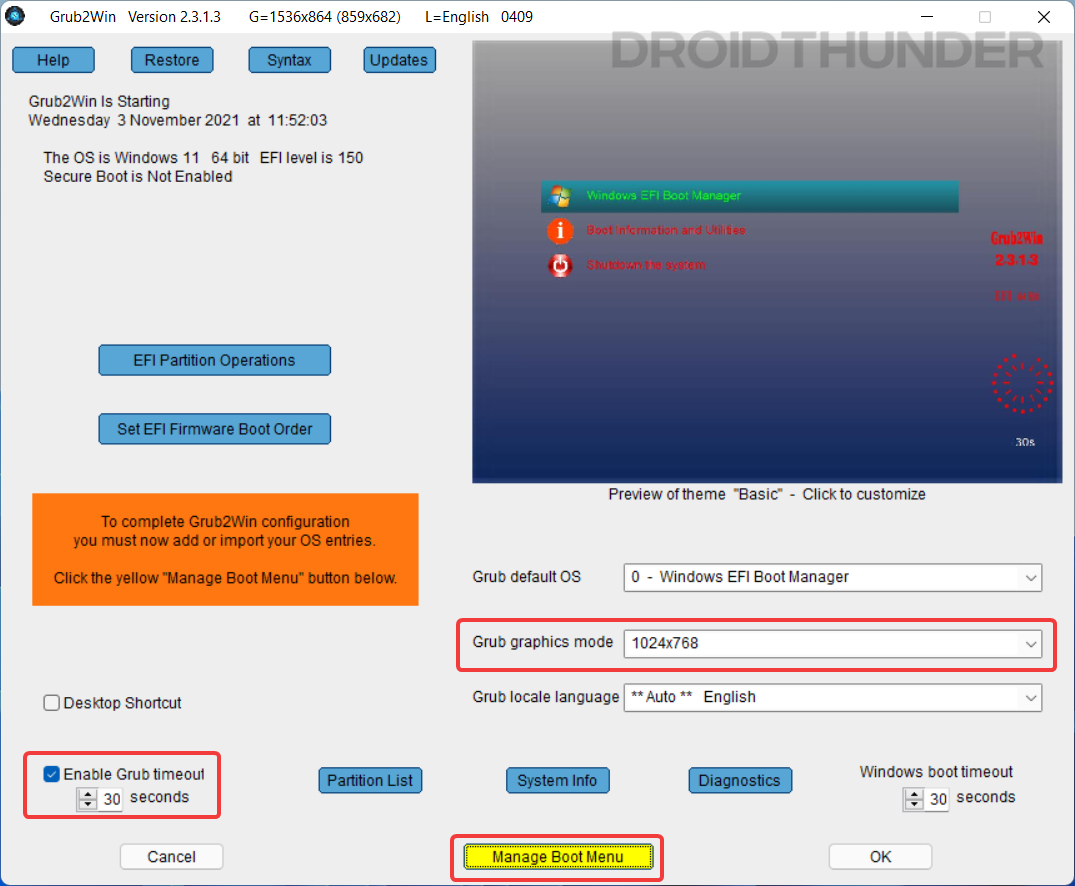
You have successfully installed Chrome OS alongside Windows, but to run it, we need to add its boot entry for it to be bootable. We’ll use the Grub2win application for this job.
Download Grub2Win(Sourceforge.net)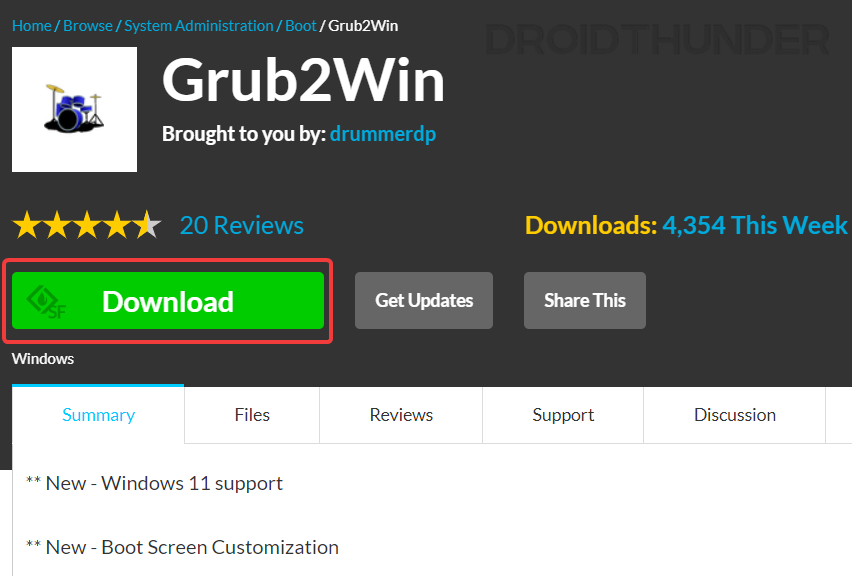
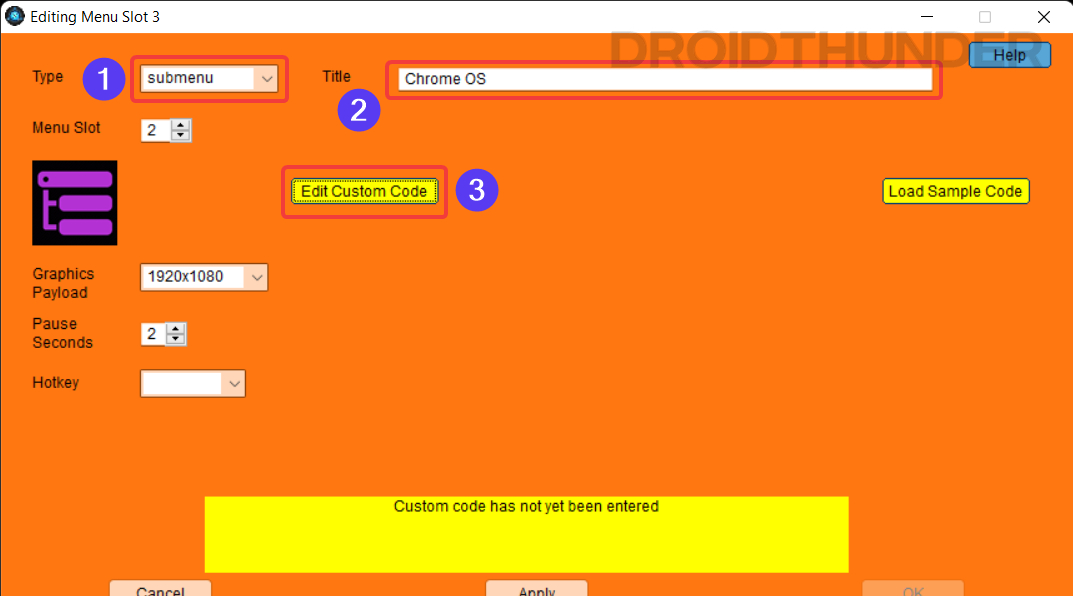
- Select Type as Submenu.
- Enter the Title as Chrome OS.
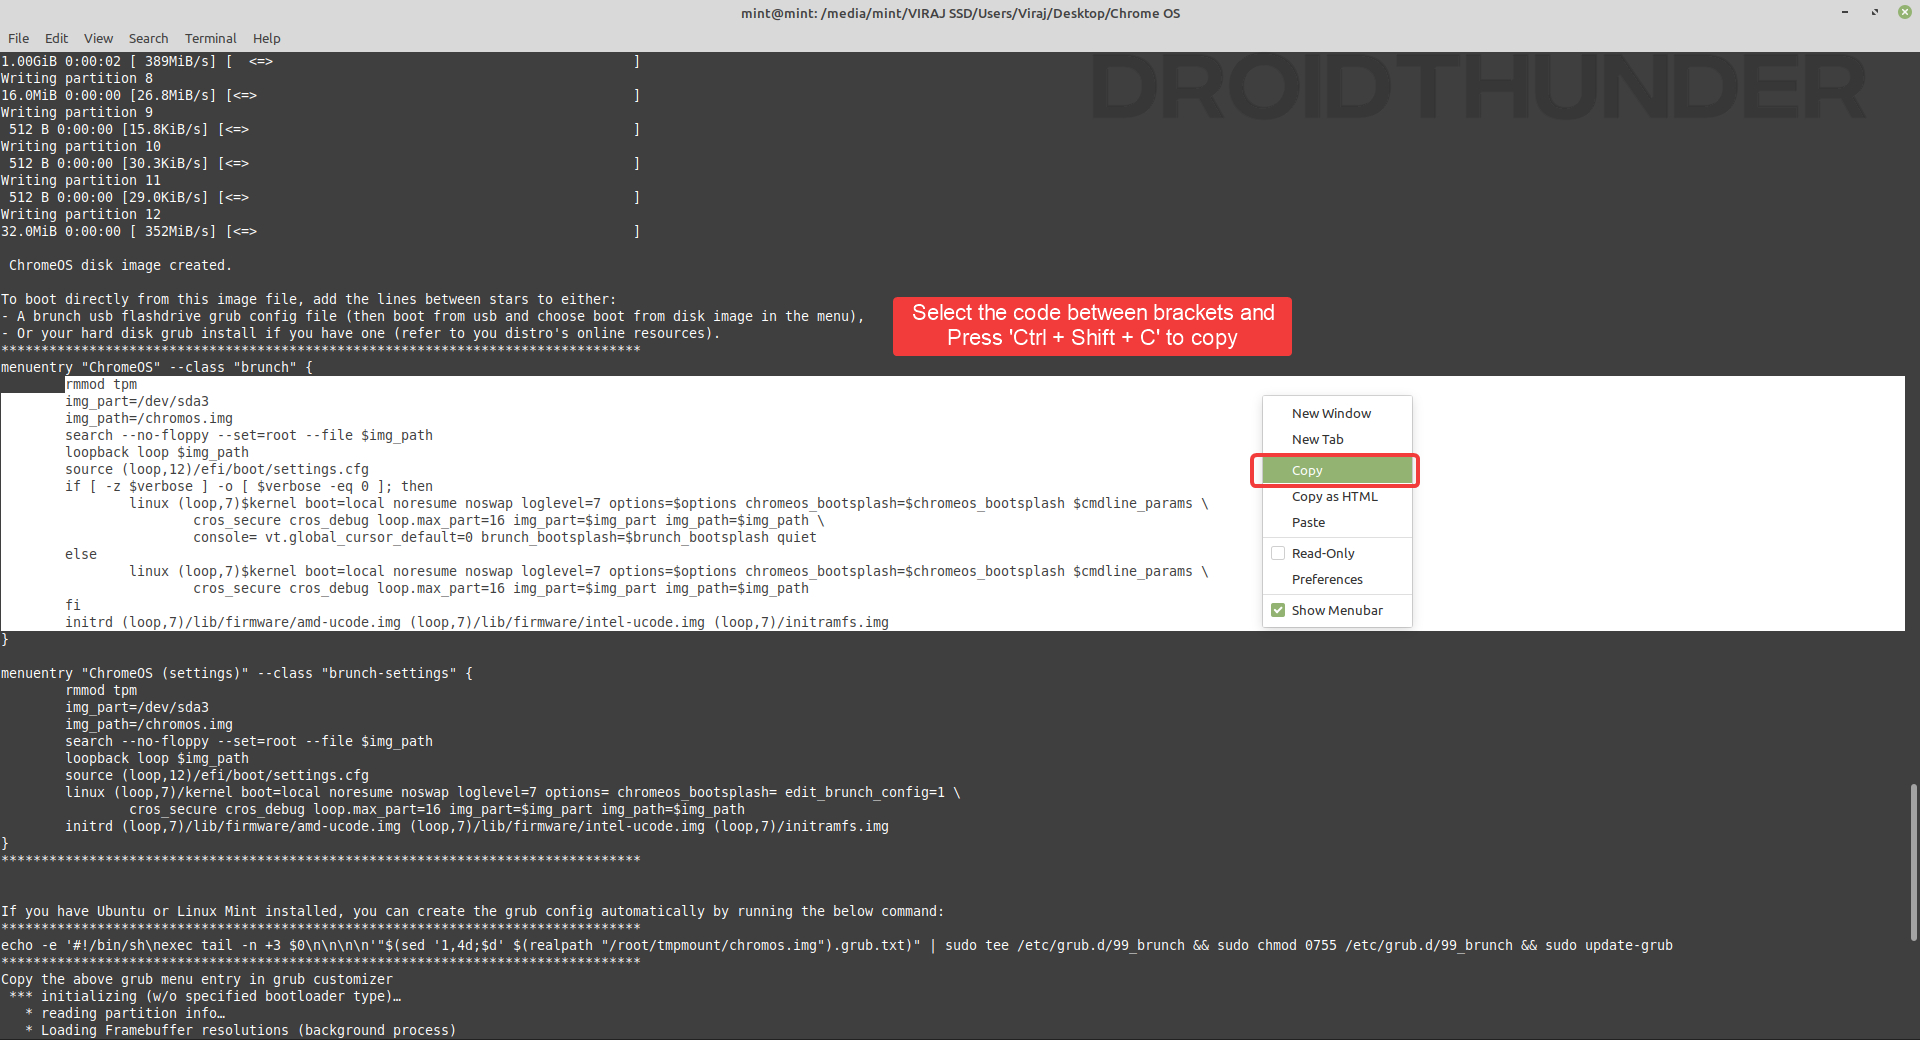
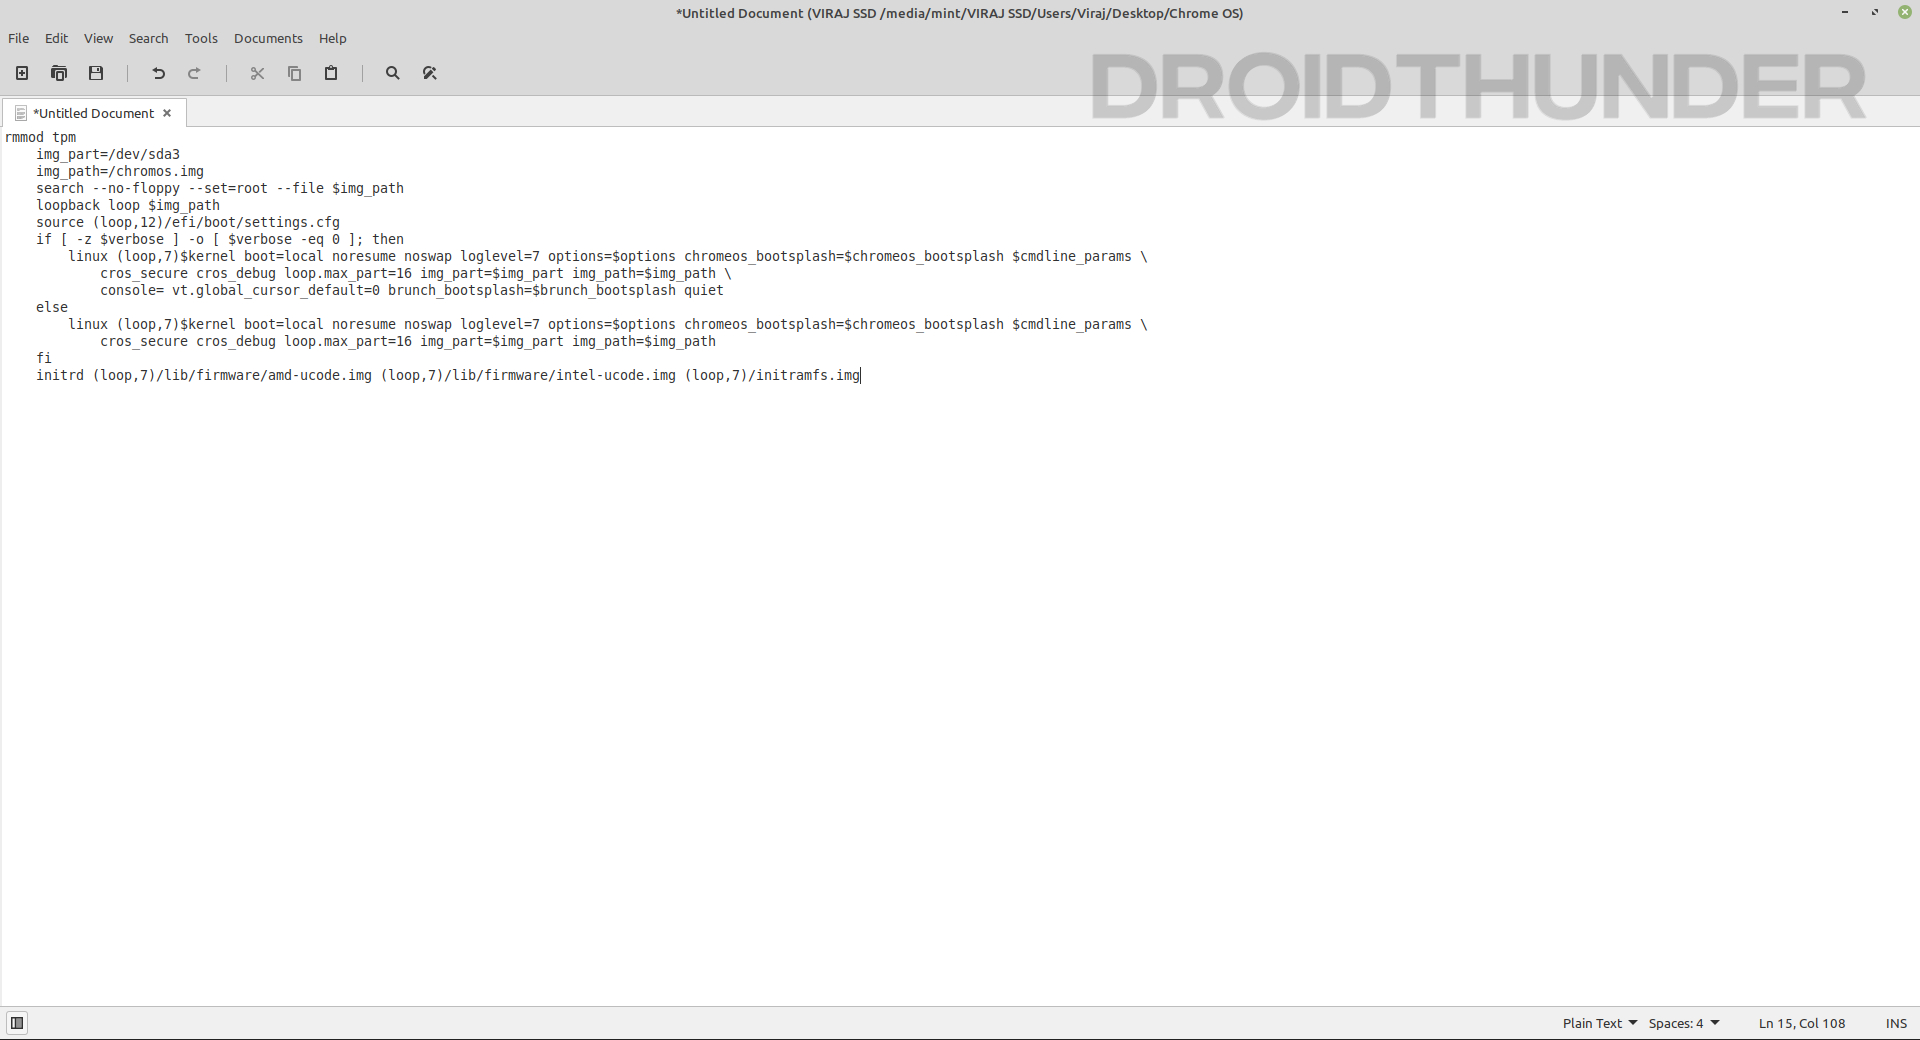
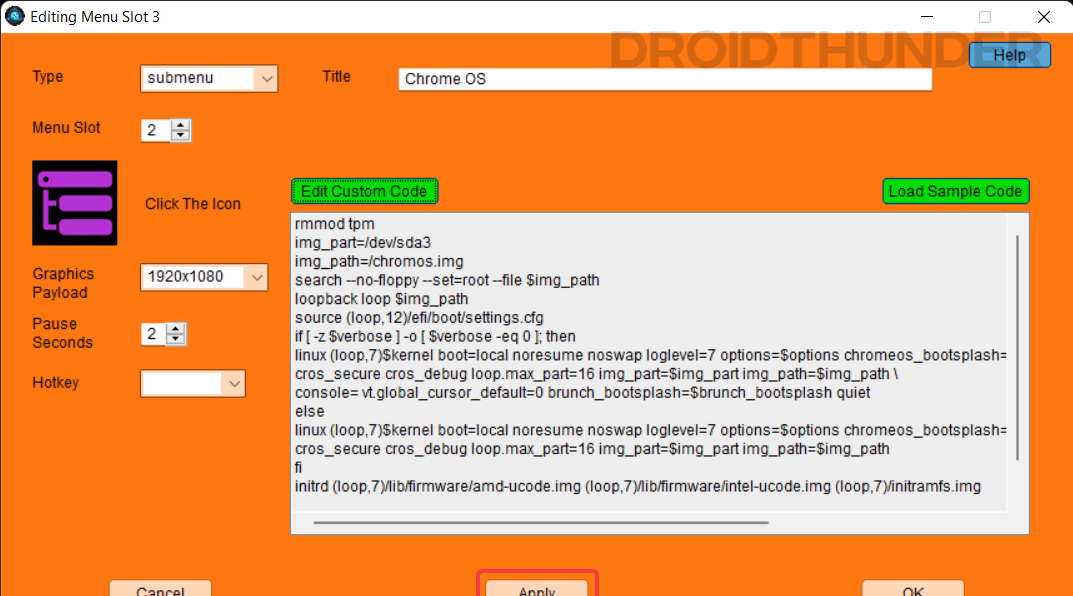
- Click on the Edit Custom Code button.
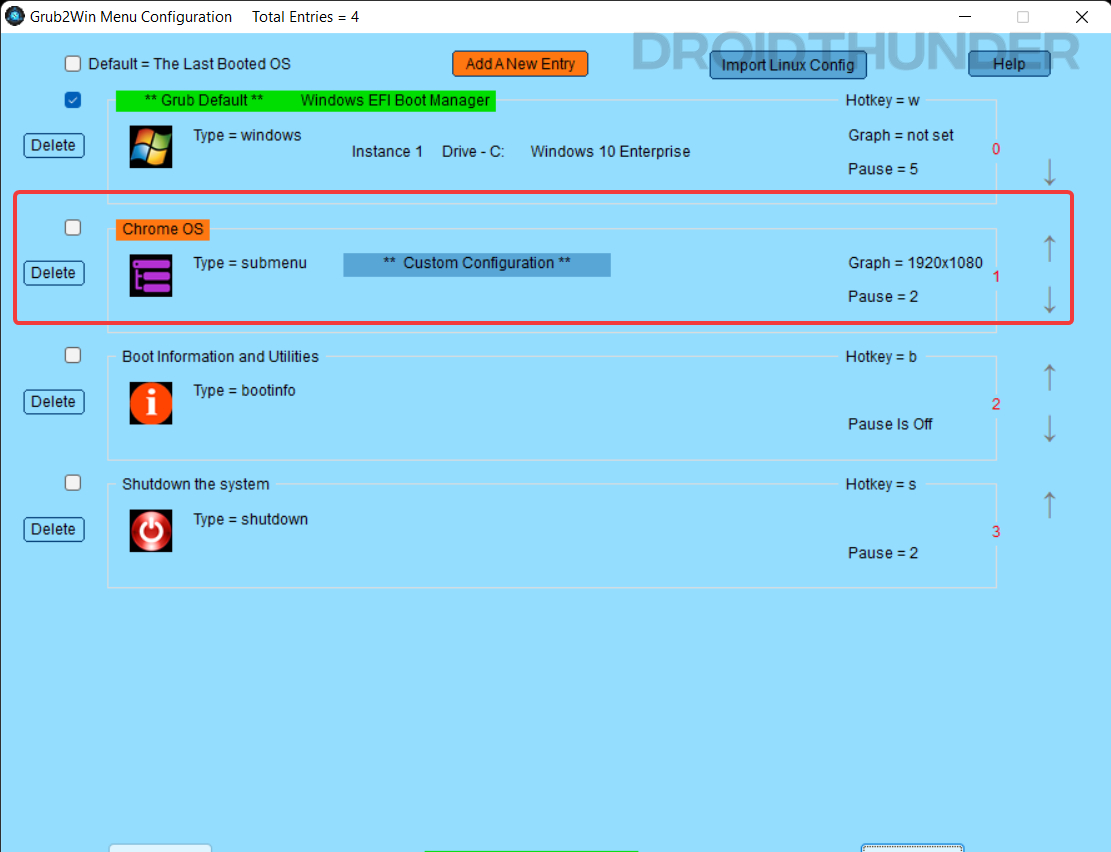
Booting into the Chrome OS using Grub2Win Menu


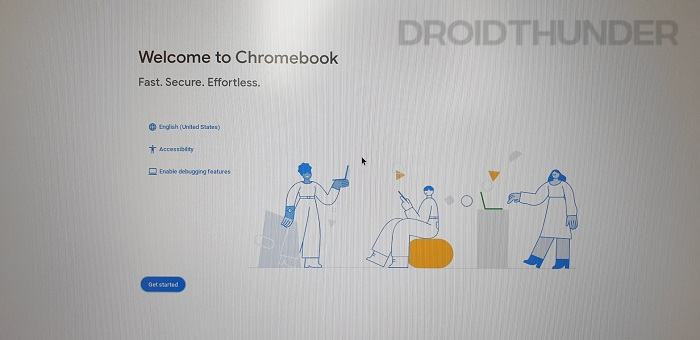
You can now set up your Google account and have fun using Chrome OS alongside your Windows 10 or Windows 11 PC. Move to the Troubleshoot section if any hardware device or WiFi is not working on the Chrome OS.
Keep in mind, before you log into the Google account, you are officially not allowed to run Chrome OS with Play Store support on non-certified machines. In some ways or the other, you might be violating Google’s terms and conditions. So, we recommend you sign in with a secondary Google account so that your primary account remains safe.
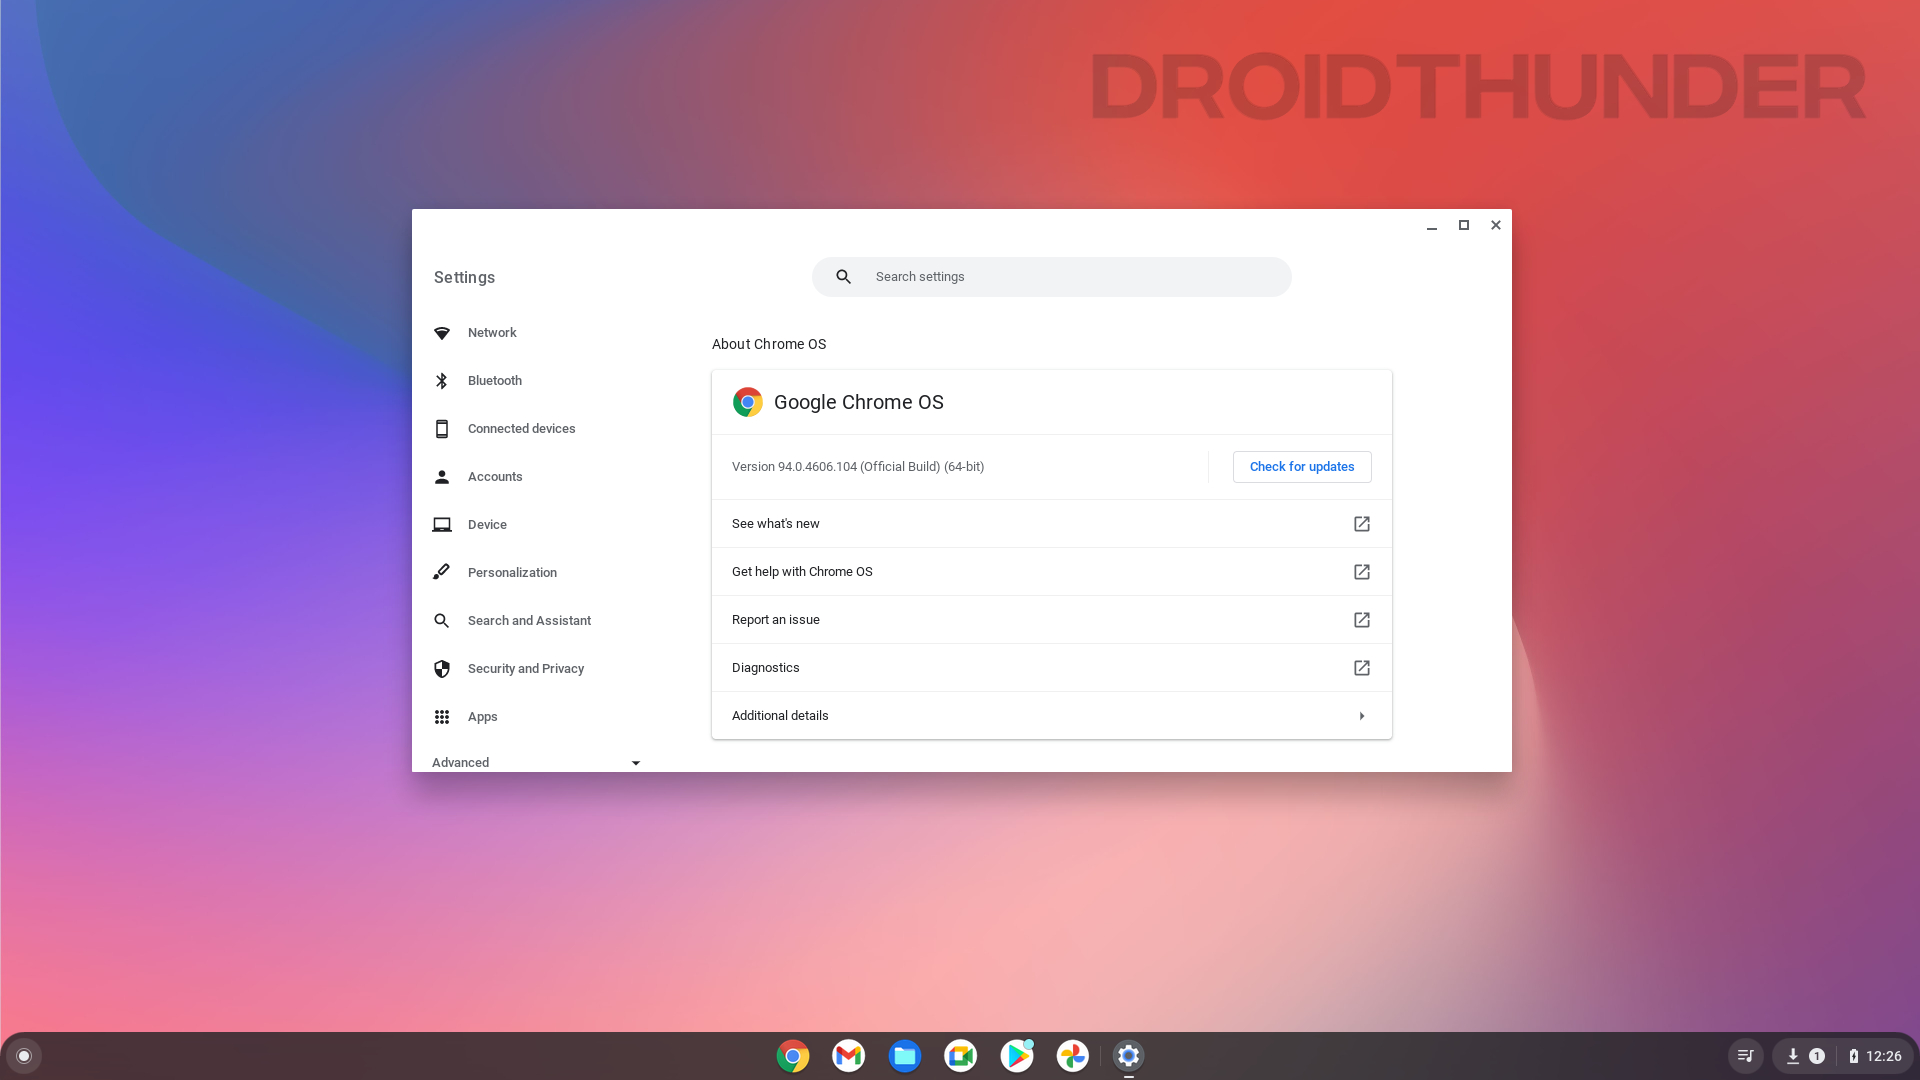
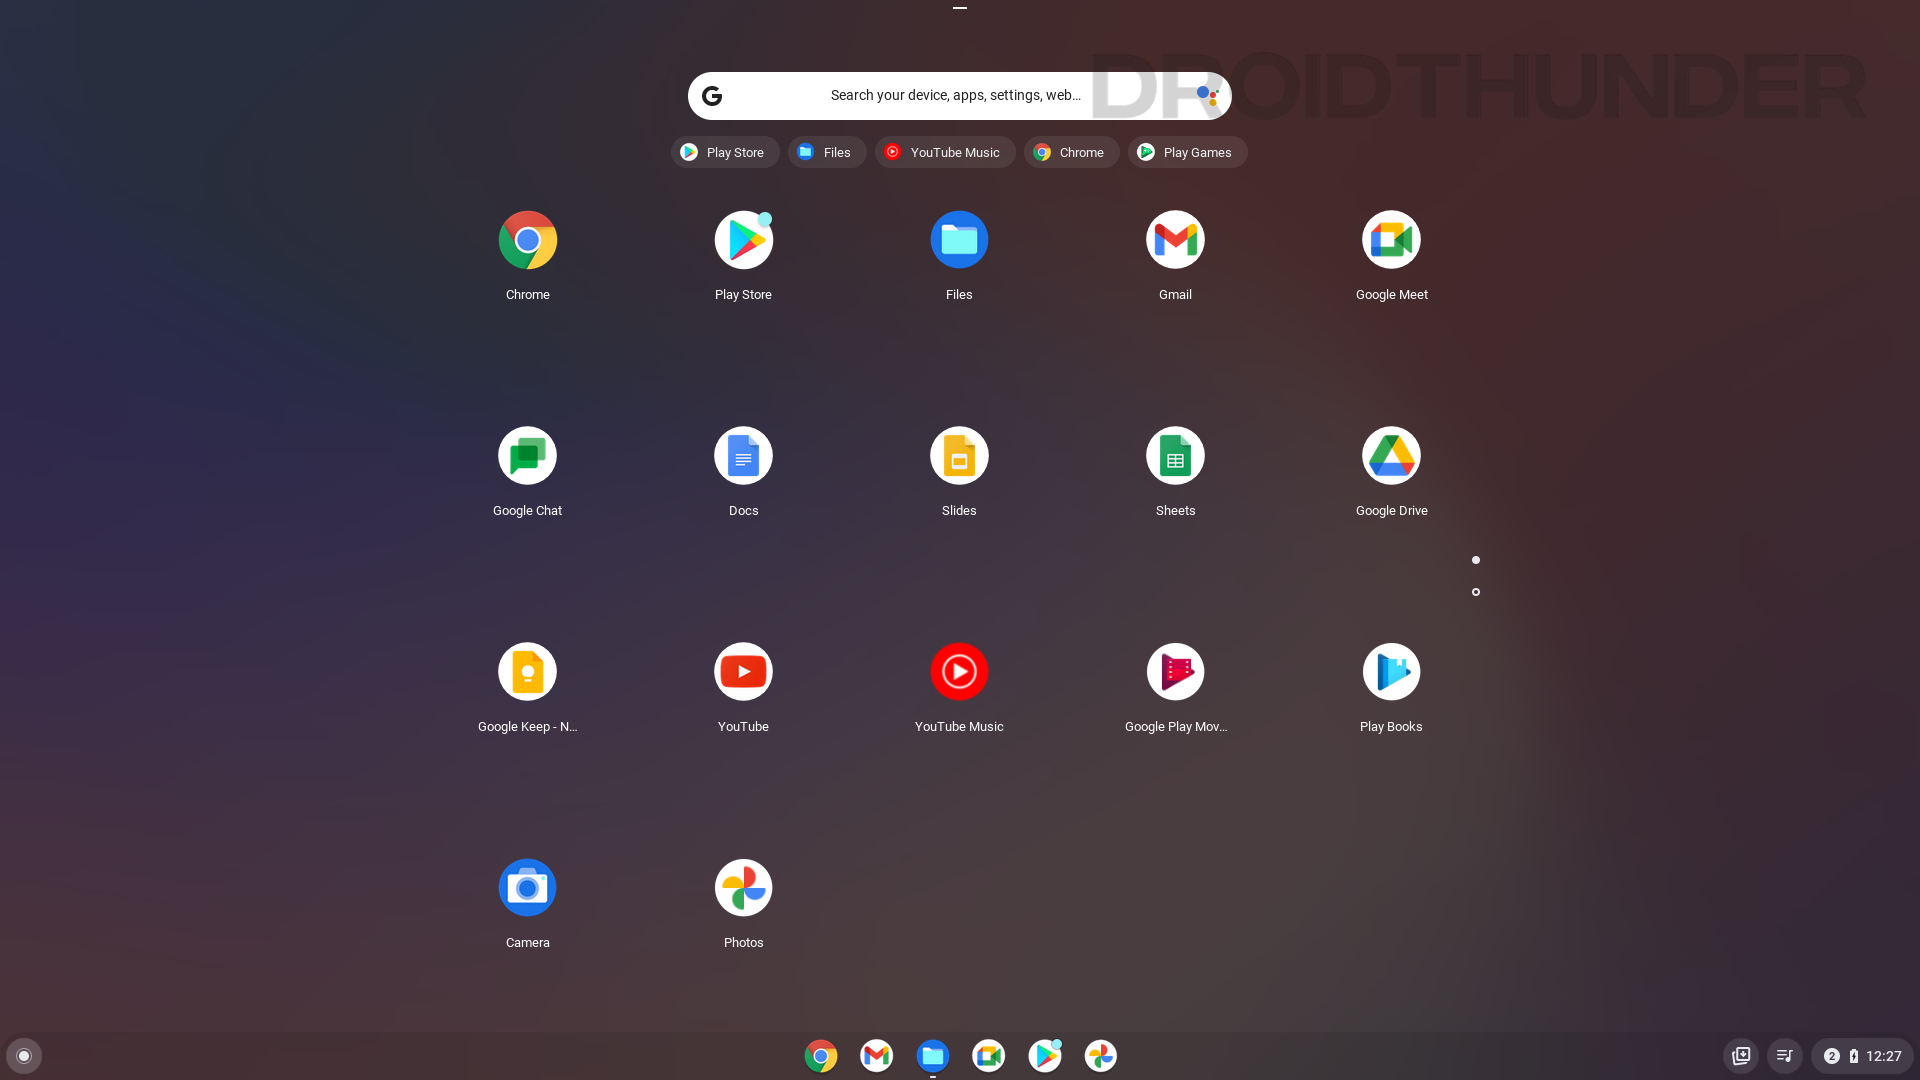
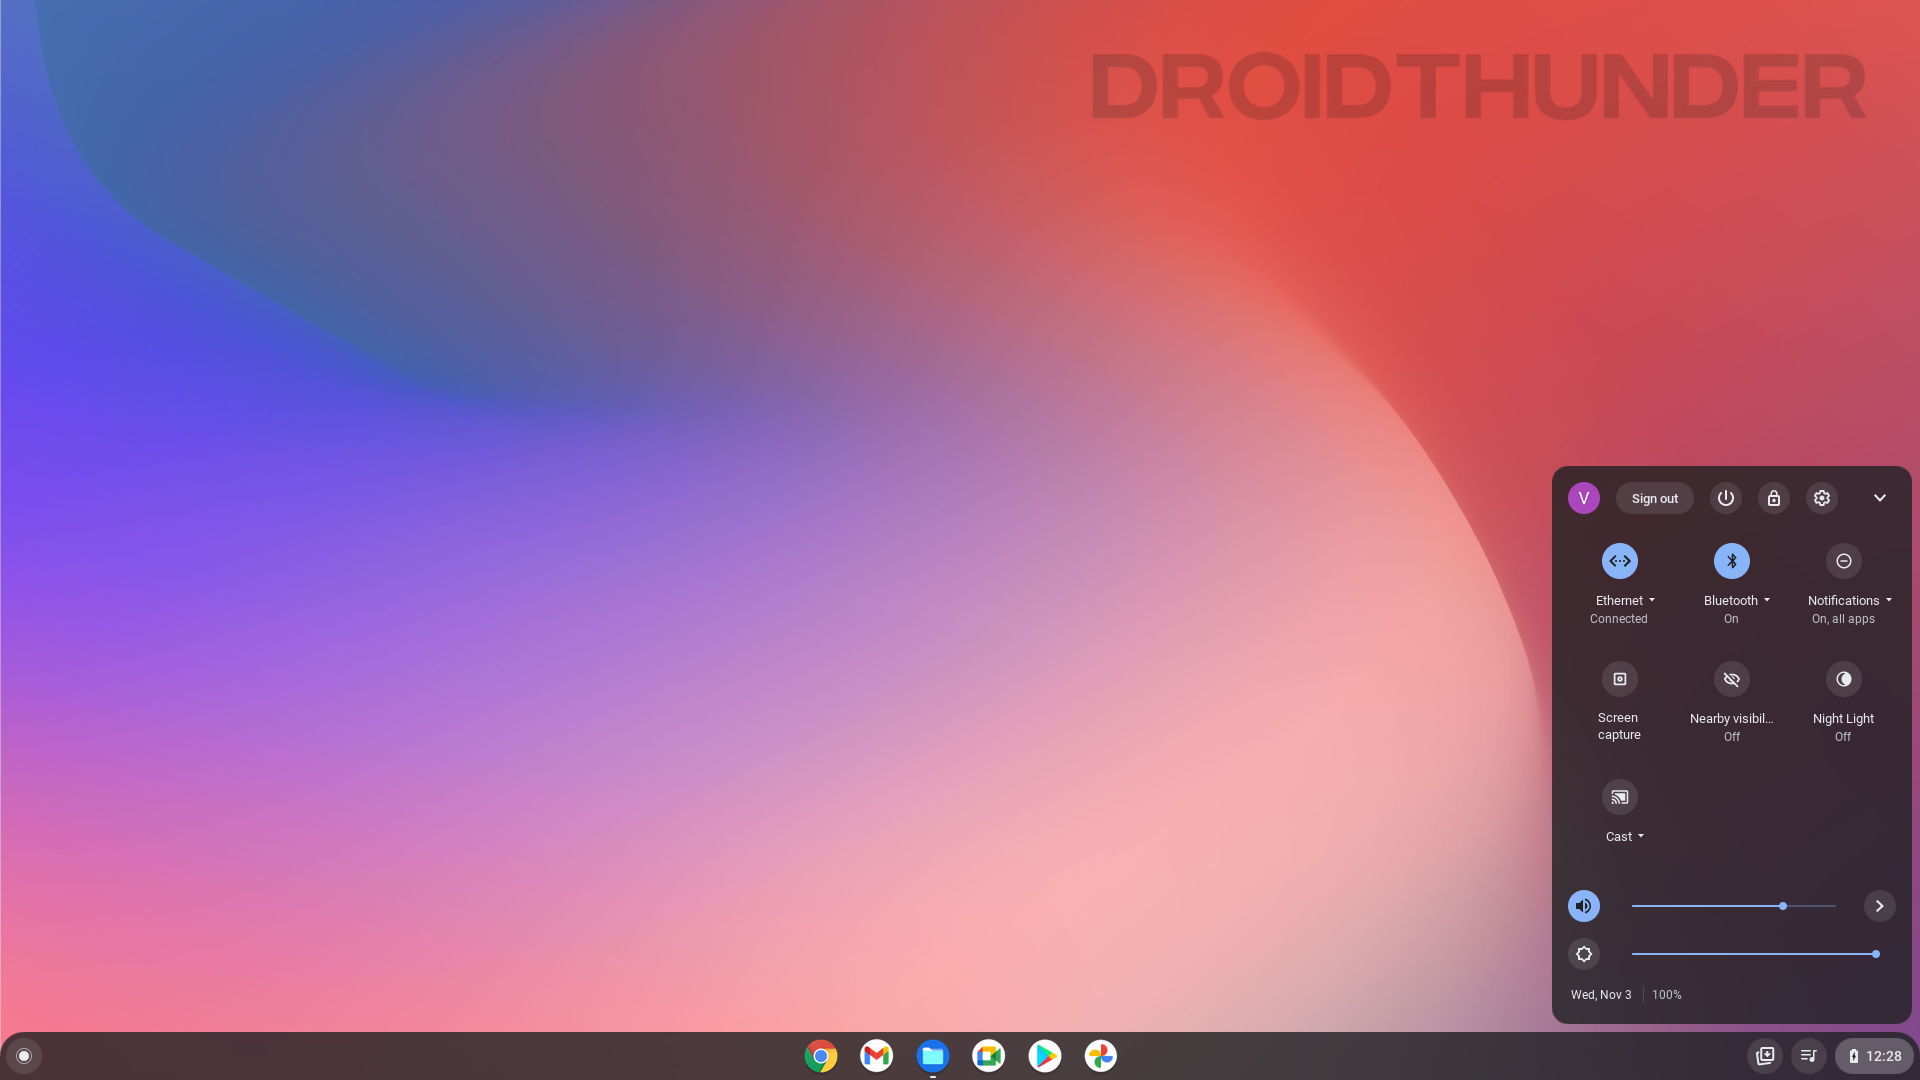
Chrome OS Screenshots
Uninstall Chrome OS From Windows PC
Installing Chrome OS on a Windows partition is one lengthy procedure. But when we talk about its uninstallation, it is simple. Just boot into Windows OS and open the Disk Management tool. Locate the Chrome OS partition we created at the beginning of this guide, right-click on it, and select format.
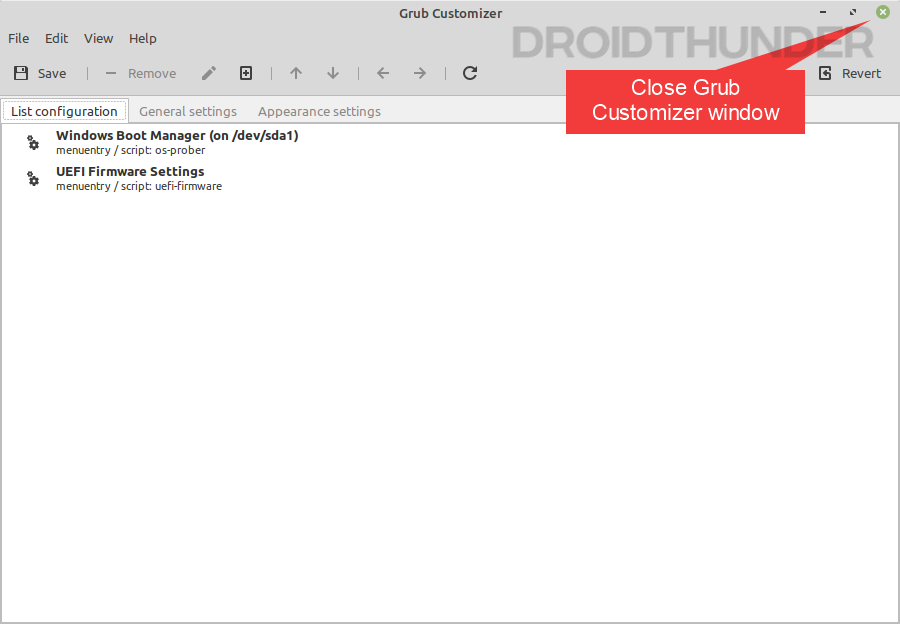
Similarly, open the Grub2Win application. Delete the Chrome OS entry we added and save the changes.
Troubleshooting
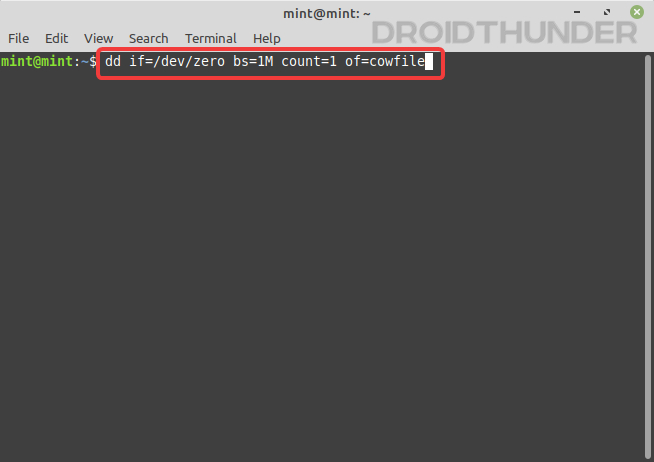
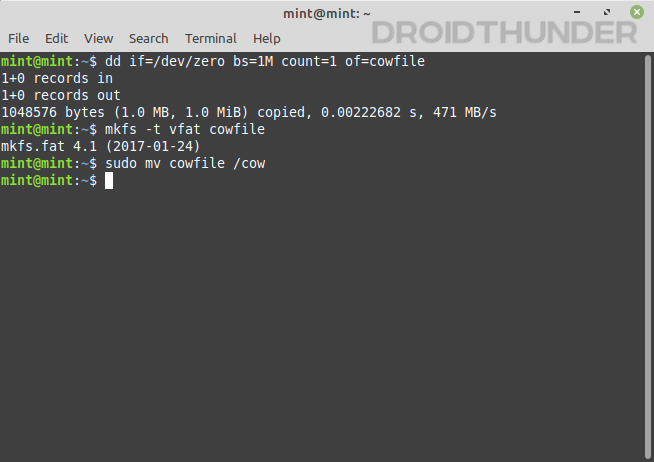
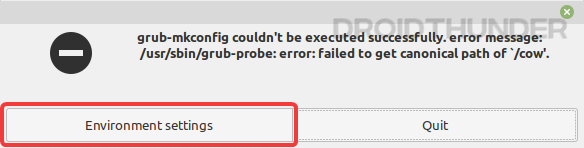
1. Fix grub-install: error: failed to get canonical path of ‘/cow’
So, you do come across this error, eh? That’s no problem. We’ll fix it by writing some quick commands in the terminal.
dd if=/dev/zero bs=1M count=1 of=cowfile
mkfs -t vfat cowfile
sudo mv cowfile /cow
2. Fix Chrome OS Wifi, Bluetooth, Touchscreen Display not working
If you face issues with specific hardware components while using the Chrome OS, you can try Chrome’s Crosh terminal to make them work.
Fix Chrome OS Bluetooth issue
shell
sudo edit-grub-config
Fix Chrome OS WiFi issue
- Find out the manufacturer of your WiFi card.
- For Broadcom WiFi cards, use the following command in the Crosh terminal.
“options=broadcom_wl“ - For Realtek WiFi cards, use the following command in the Crosh terminal.
“options=rtl8188eu” or “options=rtl8821ce“
Enjoy Chrome OS and Windows together on a Single Machine
So, that’s how you can install Windows and Chrome OS on the same hard disk and boot both OS from a single machine. The steps could be complex and lengthy for beginners, but if you’ve dealt with Linux before, it’s an easy task for you to dual-boot Windows 11 and Chrome OS.
That’s all from us in this guide. I hope you enjoyed it! If you face any issues while performing the above steps, post your comments below. We’ll try our best to help you out.